
“`html
Table of Contents
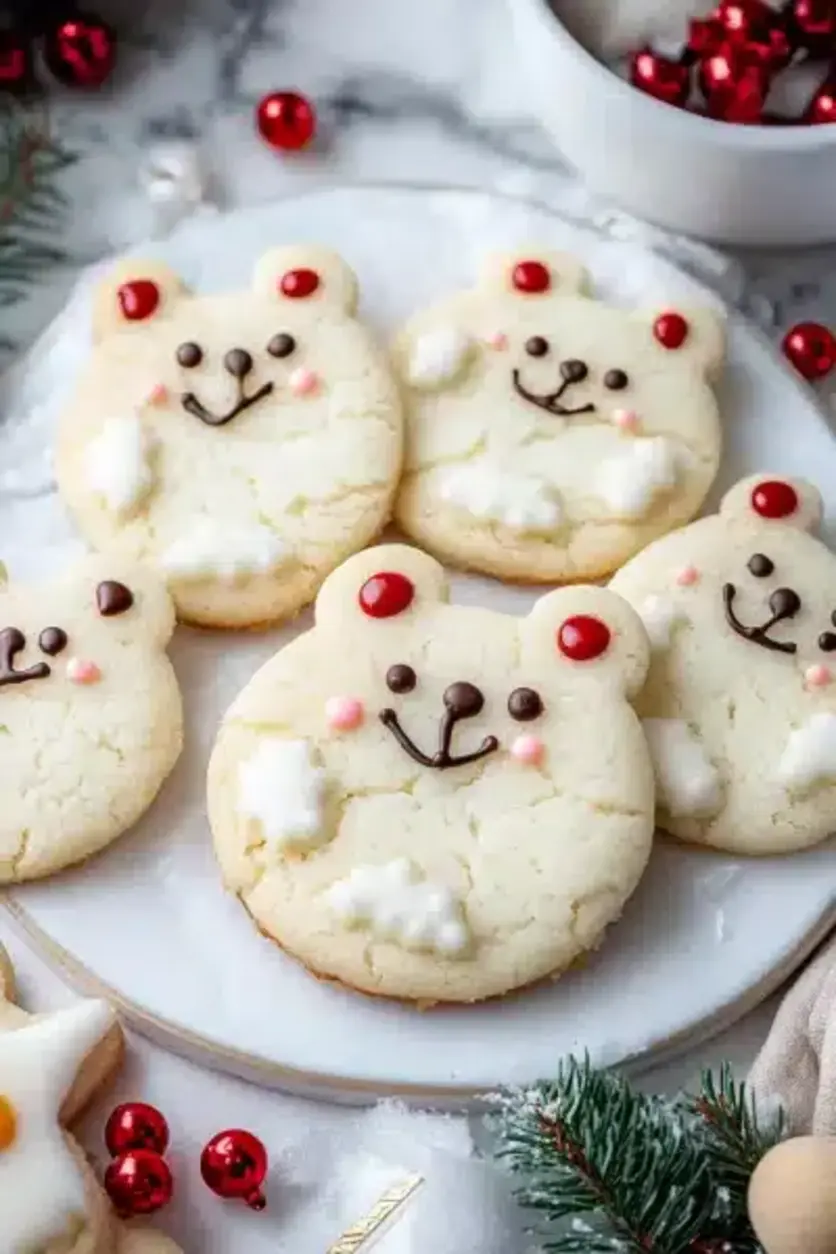
🐻 Whimsical Polar Bear Cookies: A Holiday Delight 🎄
Planning Your Festive Baking? Why These Polar Bear Cookies Are a Holiday Must-Have!
The holiday season is a magical time, filled with twinkling lights, cozy gatherings, and, of course, delicious treats! As families start planning their festive menus, a common question arises: “What can I bake that’s fun, festive, and appeals to all ages?” With the average holiday baker spending over 20 hours on festive treats, efficiency and pure joy in recipes are key. Enter our Whimsical Polar Bear Cookies! These adorable cookies aren’t just visually charming; they’re designed to be an easy and delightful addition to your Christmas baking repertoire. Imagine the smiles they’ll bring to your family and friends – they are truly a must-have for creating joyful memories around the kitchen. Let’s dive into a recipe that promises to bring warmth and whimsy to your holiday celebrations! 🐾🎅 🍪
Gather Your Sweet Ingredients
The magic of these polar bear cookies lies in simple, high-quality ingredients. We’ve also included some notes to help you achieve the perfect texture and flavor!
For the Cookies (Sweet, Buttery Foundation)
- 2 ¼ cups All-Purpose Flour: The versatile base for our cookies, providing structure. (Substitution: You can use half whole wheat for a slightly nuttier flavor, but it might alter texture slightly.)
- 1 teaspoon Baking Soda: Our leavening agent, ensuring a gentle rise without spreading too thin.
- ½ teaspoon Salt: Enhances all the sweet flavors and balances the richness.
- 1 cup (2 sticks) Unsalted Butter, softened: The heart of our cookie’s tender texture and rich, creamy taste. It should be soft enough to press with a finger but not melted.
- ¾ cup Granulated Sugar: For sweetness and crisp edges.
- ½ cup Packed Light Brown Sugar: Adds moisture, a subtle caramel note, and a chewier texture.
- 2 large Eggs: Bind the ingredients and add richness. Room temperature eggs incorporate best.
- 2 teaspoons Vanilla Extract: The classic aroma and flavor enhancer that makes cookies irresistible.
- 1 teaspoon Almond Extract (optional): Adds a sophisticated, delicate nutty aroma that complements the vanilla beautifully.
For the Royal Icing (Smooth, Sturdy Snowflakes)
- 3 cups Powdered Sugar (Confectioners’ Sugar): The fine, sweet foundation. Sifted is best to avoid lumps.
- ¼ cup Meringue Powder: The secret to smooth, stiff, and easily pipeable icing that dries hard.
- ½ teaspoon Cream of Tartar: Helps stabilize the meringue powder and achieve a brighter white.
- 6-8 tablespoons Water: Adjust the amount for the desired consistency – start with less and add more until it’s perfect.
- ½ teaspoon Vanilla Extract (for flavor, optional): A hint of sweetness to the icing itself.
For Decorating (Finishing Touches)
- Black Food Coloring: For the polar bear’s eyes and nose. Gel or paste colors are recommended for intensity.
- Pink Food Coloring (optional): For a rosy cheek effect.
- Small piping bags or Ziploc bags: For precise icing application.
- Small offset spatula or knife: For spreading icing if not piping.
Timing is Everything!
Compared to average cookie recipes which might range from 30-60 minutes of active prep and 10-15 minutes of baking, our polar bear cookies require a bit more chill time for optimal shaping. However, the active baking and decorating time is quite standard, making it a worthwhile endeavor for that extra festive flair!
Step-by-Step: Crafting Your Arctic Friends
Step 1: Prepare the Cookie Dough
In a medium bowl, whisk together the all-purpose flour, baking soda, and salt. Set this dry mixture aside. In a large bowl, cream together the softened unsalted butter, granulated sugar, and packed light brown sugar with an electric mixer on medium speed until light and fluffy, about 2-3 minutes. This creaming action is vital for a tender cookie so don’t rush it!
Beat in the eggs one at a time, ensuring each is fully incorporated before adding the next. Then, stir in the vanilla extract and almond extract (if using). The aroma at this stage is already wonderfully festive!
Step 2: Chill and Roll
Gradually add the dry ingredients to the wet ingredients, mixing on low speed until just combined. Be careful not to overmix, as this can lead to tough cookies. The dough will be soft.
Divide the dough in half, flatten each half into a disc, wrap tightly in plastic wrap, and refrigerate for at least 2 hours, or until firm enough to roll. This chilling step is crucial for preventing the cookies from spreading too much during baking, ensuring those cute polar bear shapes hold their form.
Step 3: Cut and Bake
Preheat your oven to 375°F (190°C). Line baking sheets with parchment paper. On a lightly floured surface, roll out one disc of chilled dough to about ¼-inch thickness. Use a polar bear cookie cutter to cut out your shapes. If you don’t have a polar bear cutter, you can get creative with a simple round cutter and then add ears and a snout using a smaller cutter or a knife.
Carefully transfer the cut cookies to the prepared baking sheets, leaving about 1 inch between them. Bake for 10-12 minutes, or until the edges are lightly golden. Let the cookies cool on the baking sheets for a few minutes before transferring them to a wire rack to cool completely. This allows them to firm up before decorating.
Step 4: Make the Royal Icing
While the cookies are cooling, prepare the royal icing. In a clean, dry bowl of a stand mixer fitted with the whisk attachment (or using a hand mixer), combine the powdered sugar, meringue powder, and cream of tartar. Whisk on low speed for about 30 seconds to combine.
Add 6 tablespoons of water and the vanilla extract (if using). Beat on medium-high speed for 5-7 minutes, or until the icing is stiff, smooth, and glossy – it should hold stiff peaks. If the icing is too thick, add water a teaspoon at a time. If it’s too thin, add a little more powdered sugar. Remember, royal icing dries hard, which is perfect for detailed decorating!
Step 5: Decorate the Polar Bears
Once the cookies are completely cool, it’s time for the fun part! Separate about half a cup of the royal icing into a small bowl and tint it black using black food coloring. Also, tint a tiny amount pink if you desire rosy cheeks.
Fit your piping bags with a small round tip or snip a tiny corner off a Ziploc bag. Fill the black icing into one bag. Outline the polar bear cookies with the black icing, creating the general shape of the head, body, and any appendages if your cutter wasn’t detailed enough. Then, flood the inside of the outlined areas with white royal icing (you can use a slightly thinned consistency for flooding if needed, or simply use a spatula to spread). This creates the fluffy white fur!
While the white icing is still wet, use the black icing to pipe small dot eyes and a snout. Add a tiny dot of pink for cheeks if you like. You can also add a swirl for a scarf or a little hat! Let the decorated cookies dry completely, which can take several hours depending on humidity. This ensures your beautiful creations are ready to be enjoyed!
Nutritional Snapshot
A typical serving of 1 Whimsical Polar Bear Cookie (estimated, as exact size and decoration amount vary) contains approximately:
- Calories: 150-200 kcal
- Carbohydrates: 20-25g
- Fat: 8-10g
- Protein: 2-3g
- Sugar: 12-16g
*Note: Nutritional information is an estimate and can vary based on exact ingredients and portion sizes.
Healthier Twists on the Arctic Fun
While traditional holiday cookies are a treat, you can make some smart swaps:
- Flour: Substitute half of the all-purpose flour with whole wheat pastry flour for added fiber and nutrients, while maintaining a tender crumb.
- Sweetener: Reduce the sugar in the cookie dough by ¼ cup and rely on the icing for sweetness.
- Icing: For a lighter frosting, consider a simple glaze made with powdered sugar and a touch of milk or lemon juice. For decorating, use sparingly, or explore natural food colorings made from fruits and vegetables.
- Butter: You could experiment with unsalted butter alternatives, though this may affect texture.
Serving Suggestions for Maximum Cheer
These polar bear cookies are perfect on their own, but consider these ideas to elevate your holiday spread:
- Arrange them on a festive platter alongside other holiday cookies, like gingerbread or sugar cookies.
- Package them in clear cellophane bags tied with a festive ribbon as delightful edible gifts for neighbors, teachers, or colleagues.
- Serve them with a steaming mug of hot cocoa or a glass of cold milk for a classic holiday pairing.
- Use them as a charming edible decoration for your Christmas cake or cupcakes!
Common Mistakes to Avoid
To ensure your polar bears turn out perfectly:
- Overmixing the dough: This develops gluten and makes cookies tough. Mix until just combined.
- Not chilling the dough sufficiently: This is key to preventing spread. If the dough is too warm, it will be difficult to cut and will bake into shapeless blobs.
- Overbaking: Keep an eye on them; they should be lightly golden at the edges. Overbaked cookies will be dry and hard.
- Decorating on warm cookies: Ensure cookies are completely cool before icing, or the icing will melt and slide off.
- Icing consistency issues: Too thin, and it runs everywhere; too thick, and it’s hard to pipe. Aim for a floodable consistency or a firm piping consistency.
Keeping Your Polar Bears Fresh
Store fully dried, undecorated cookies in an airtight container at room temperature for up to a week. Once decorated, store them in a single layer in a container, with parchment paper between layers if stacking, to prevent sticking. They should also last up to a week at room temperature. For longer storage, undecorated cookies can be frozen for up to 3 months.
Bring the Arctic to Your Holiday Table!
These Whimsical Polar Bear Cookies are more than just a recipe; they’re an invitation to create joy, share laughter, and make lasting memories. Their charming appearance and delightful taste make them a perfect addition to any holiday gathering, cookie exchange, or festive treat box. Whether you’re a seasoned baker or just starting, this recipe is designed to guide you to sweet success. So, gather your loved ones, put on some festive music, and let’s get baking!
Ready to add these delightful polar bears to your holiday baking list? Try this recipe and share your creations with us!
Frequently Asked Questions
***Can I make these cookies dairy-free?***
Yes, you can substitute the unsalted butter with a dairy-free butter alternative. Ensure it’s solid at room temperature for best results. For the icing, you’ll need to use a dairy-free milk alternative if you opt for a glaze, or stick to meringue powder, which is naturally dairy-free.
***How do I get my royal icing perfectly smooth?***
Ensure your meringue powder and other dry ingredients are sifted, and gradually add liquid (water) until you reach the desired consistency. For a very smooth finish, you can use a small offset spatula to gently spread the icing over the cookie after piping the outline. Avoid overworking the icing once it’s on the cookie.
***Can I use different cookie cutters for these?***
Absolutely! This recipe is perfect for any holiday-themed cookie cutter. You can adapt the decorating to match. Think snowmen, trees, stars, or even simple circles that can be decorated to resemble snowflakes!
***Why did my cookies spread so much?***
The most common reason for cookies spreading excessively is not chilling the dough adequately. Also, over-creaming the butter and sugar, or using melted butter instead of softened, can contribute to spread. Ensure your oven temperature is accurate as well; too hot and they might spread before they set.
***How long does royal icing take to dry?***
Royal icing typically takes anywhere from 4 to 8 hours to dry completely, but this can vary significantly based on the thickness of the icing, the humidity in the air, and air circulation. For best results, leave them out in a well-ventilated area for at least several hours, or overnight, before stacking or packaging.
Polar Bear Cookies Recipe: Adorable, Soft, and Delicious!

These adorable Polar Bear Cookies are made with a soft cream cheese cookie base, topped with creamy buttercream frosting, and decorated to resemble playful polar bears. Perfect for holiday parties, baking with kids, or adding a sweet, festive touch to your dessert table!
Ingredients
- 3/4 cupunsalted butter, room temperature (170g)
- 1/2 cupfull-fat cream cheese, room temperature (113g)
- 1 1/2 cupsgranulated sugar (300g)
- 1large egg, room temperature (56g)
- 2 tspvanilla extract (8g)
- 3 cupsall-purpose flour (375g)
- 1 Tbspcornstarch (8g)
- 1/2 tspbaking powder (2g)
- 1/2 tspfine salt (3g)
- 1 cupunsalted butter, room temperature (226g)
- 1 Tbspvanilla extract (12g)
- 1/2 tspfine salt (3g)
- 3 1/2 cupspowdered sugar (454gor 1 lb. box)
- 1/4 cupheavy cream (60g)
- 1 cupwhite sanding sugar
- 30large chocolate chips
- Round black sprinkles (for eyes)
- Round red or pink sprinkles (for cheeks)
Instructions
- In a large bowl, beat butter and cream cheese until smooth. Add sugar and cream until light and fluffy. Mix in egg and vanilla.
- In a separate bowl,whisktogether flour, cornstarch, baking powder, and salt. Gradually add dry ingredients to the wet mixture.
- Divide dough into two portions, wrap in plastic, and chill for at least 2 hours.
- Roll dough to 1/3-inch thickness and cut out 2 1/2-inch circles for faces and 3/4-inch circles for ears. Assemble polar bears by attaching ears to faces. Chill for 15 minutes.
- Bake cookies at 350°F (175°C) for 12–14 minutes or until edges are set. Cool completely.
- Beat butter until creamy for frosting. Add vanilla and salt, then mix in powdered sugar and cream until smooth. Pipe frosting onto cookies and dip in sanding sugar.
- Add a frosted oval for the muzzle, chocolate chips for noses, and sprinkles for eyes and cheeks. Enjoy your creations!
Notes
Chilling the dough is essential for preventing spread.
Store frosted cookies in an airtight container at room temperature for 2 days, in the fridge for up to 5 days, or freeze for up to 1 month.
For best results, don’t overbake the cookies.
Nutrition
- Calories: 205
- Sugar: 21g
- Fat: 10g
- Carbohydrates: 28g
- Protein: 2g
“`
Leave a Reply